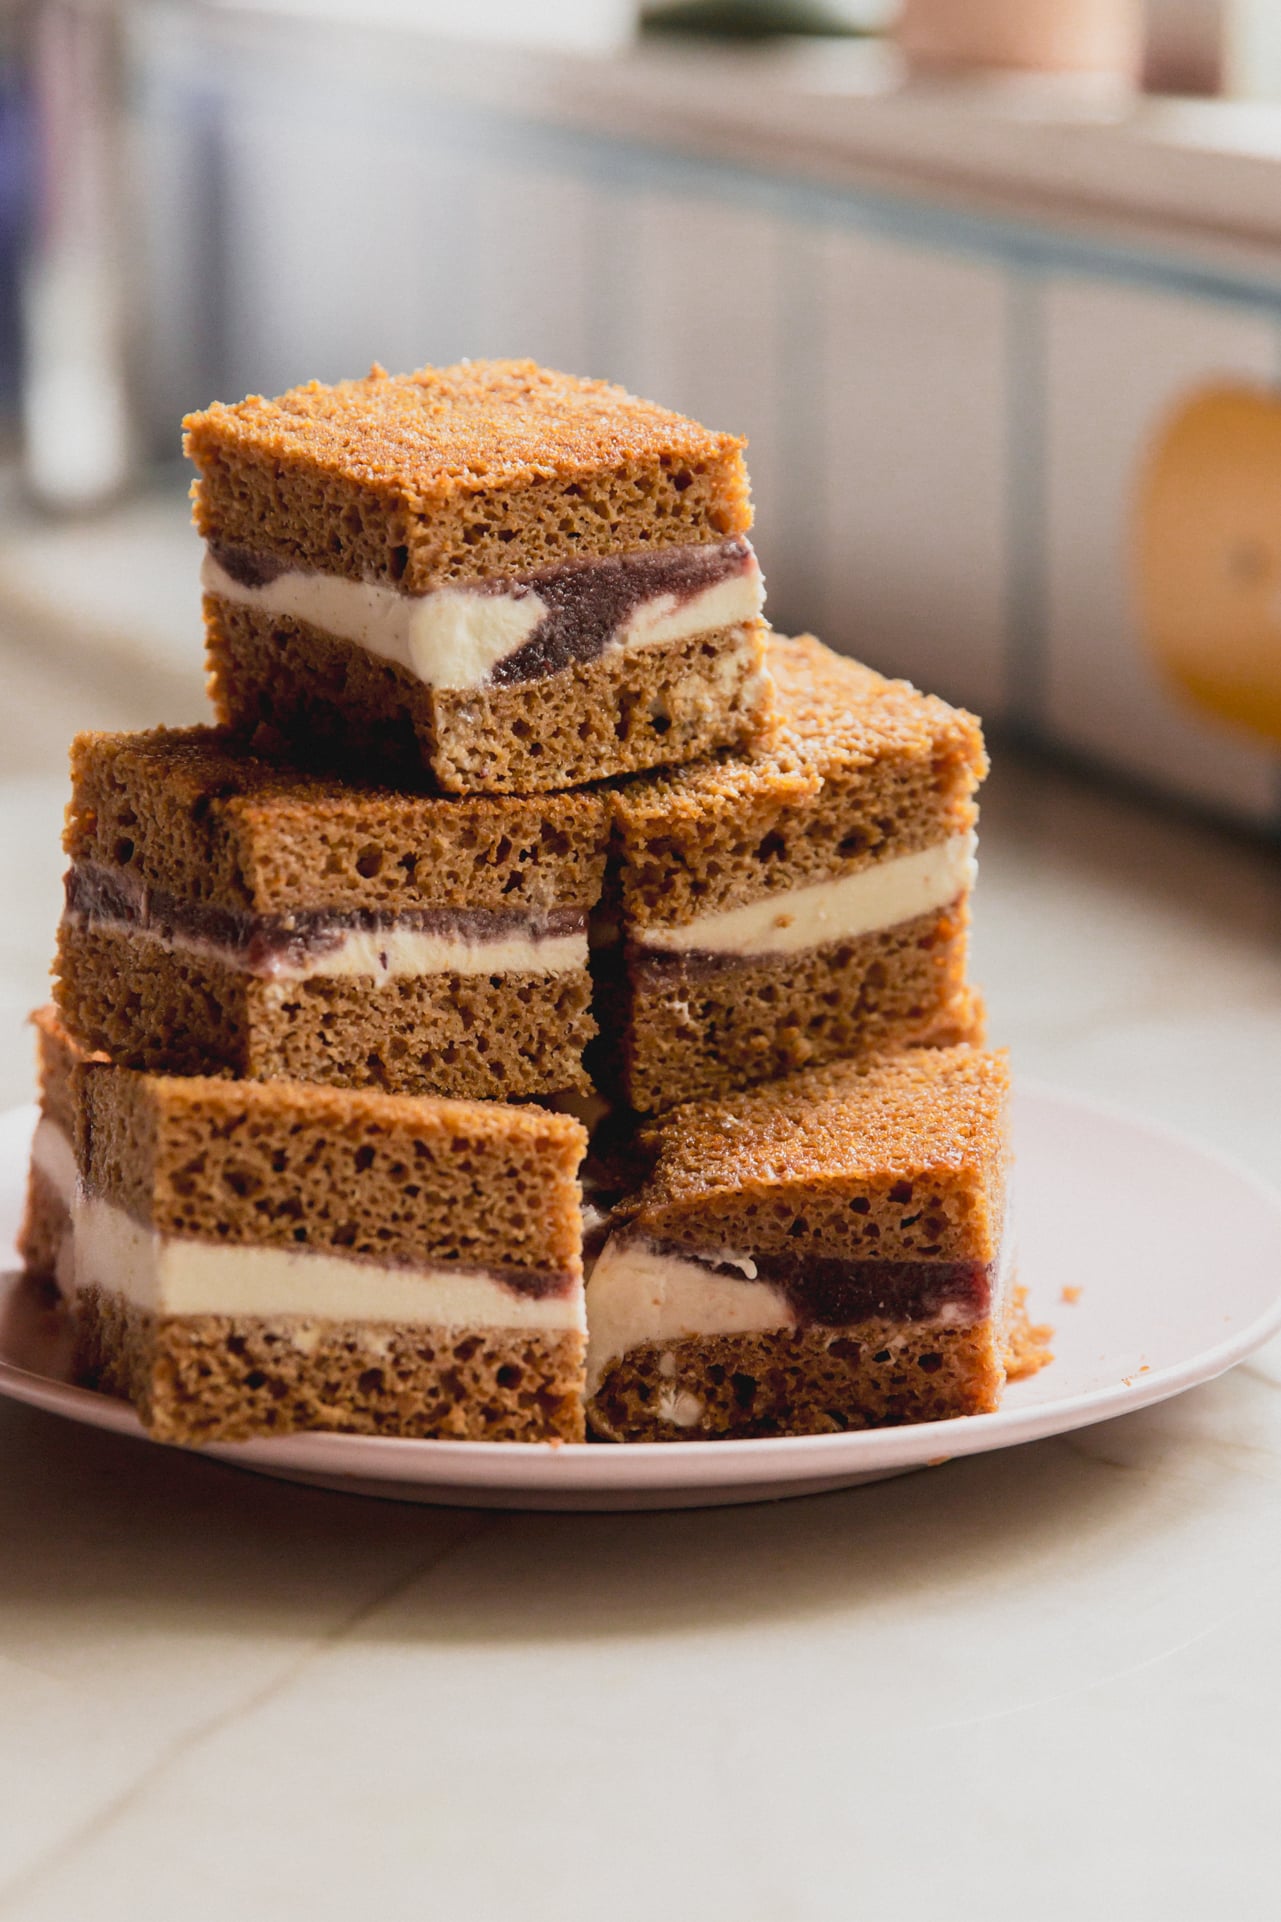
Gluten Free Ice Cream Cake Bars
These ice cream cake bars are the perfect dessert for a crowd! With gluten-free cake mix, dairy-free ice cream, and jam, they couldn’t be easier.
Why you’ll love these Gluten-Free Ice Cream Cake Bars
When it comes to summer BBQ’s, I like keeping it as simple as possible. I love throwing together a simple tuna pasta salad, making burgers like my spinach-avocado chicken burgers, and a really simple dessert like my brownie ice cream sandwiches. Those ice cream sandwiches are such a hit in my family that I wanted to make a cake version, and it’s just as yummy!
These gluten-free ice cream cake bars are not your traditional ice cream cake. They’re made with cake mix, ice cream, and jam for a delicious ice cream bar that feels a touch elevated! Here’s why you’ll love it…
- Basically 3 ingredients. Obviously, you still need the ingredients to make the cake mix, but that’s all just kitchen staples! No searching high and low for special ingredients to make this one, it’s so minimal.
- It feels a little fancy. This feels so much more put together than unwrapping plastic and handing your guests an ice cream sandwich. It feels thoughtful and unique while still being really simple to put together.
- Customizable! I’ve included the exact ingredients I use for this recipe, but you can swap in a different cake mix, ice cream flavor, or jam, etc. This is just the template for the perfect dessert.
Recipe Ingredients
See the recipe card below for full information on ingredients and quantities.
- Gluten-free cake mix. I use Simple Mills cake mix.
- Dairy-free ice cream. I like using vanilla ice cream from Cosmic Bliss, but you can use
- Strawberry jam. You can also use peach, cherry, or a different berry jam.
How to make Gluten-Free Ice Cream Cake Bars
Here are the simple steps, with photos, to make this recipe. Find full instructions in the recipe card.
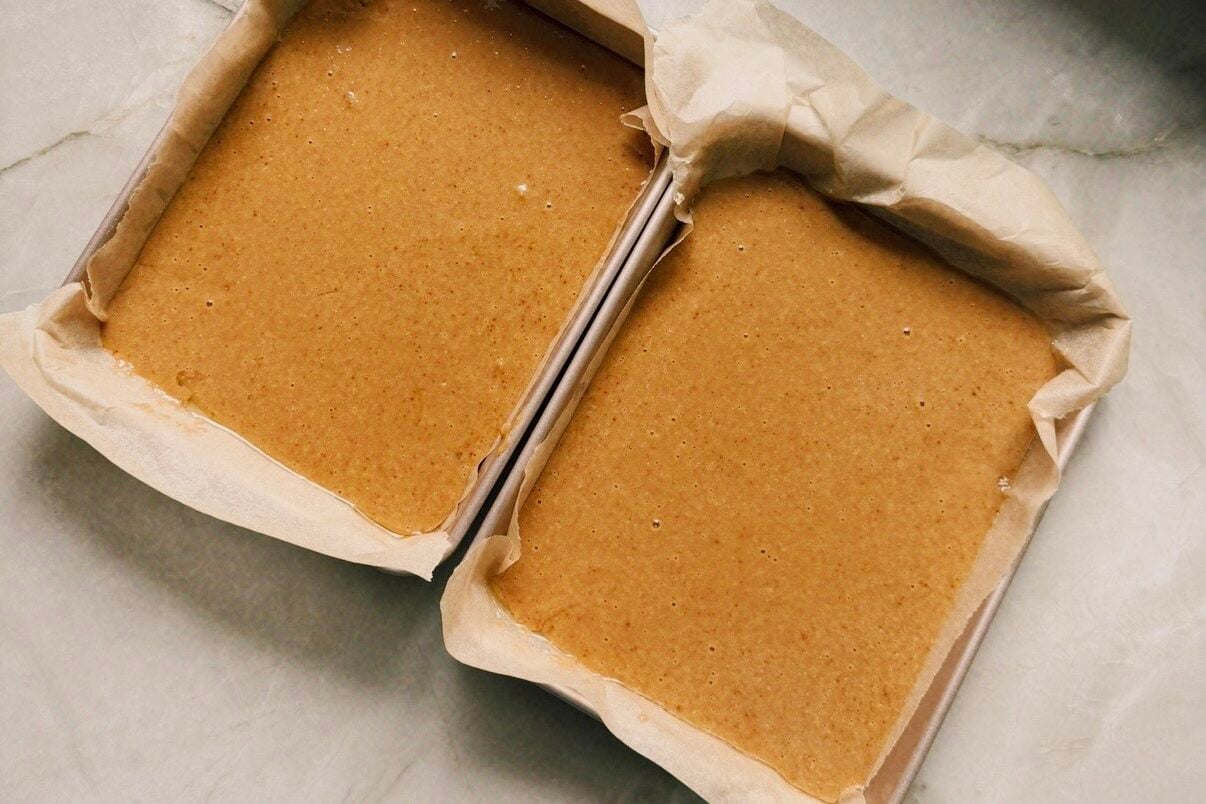
Step one. Prepare the cake batter and divide it between two 1/8th sheet baking pans.
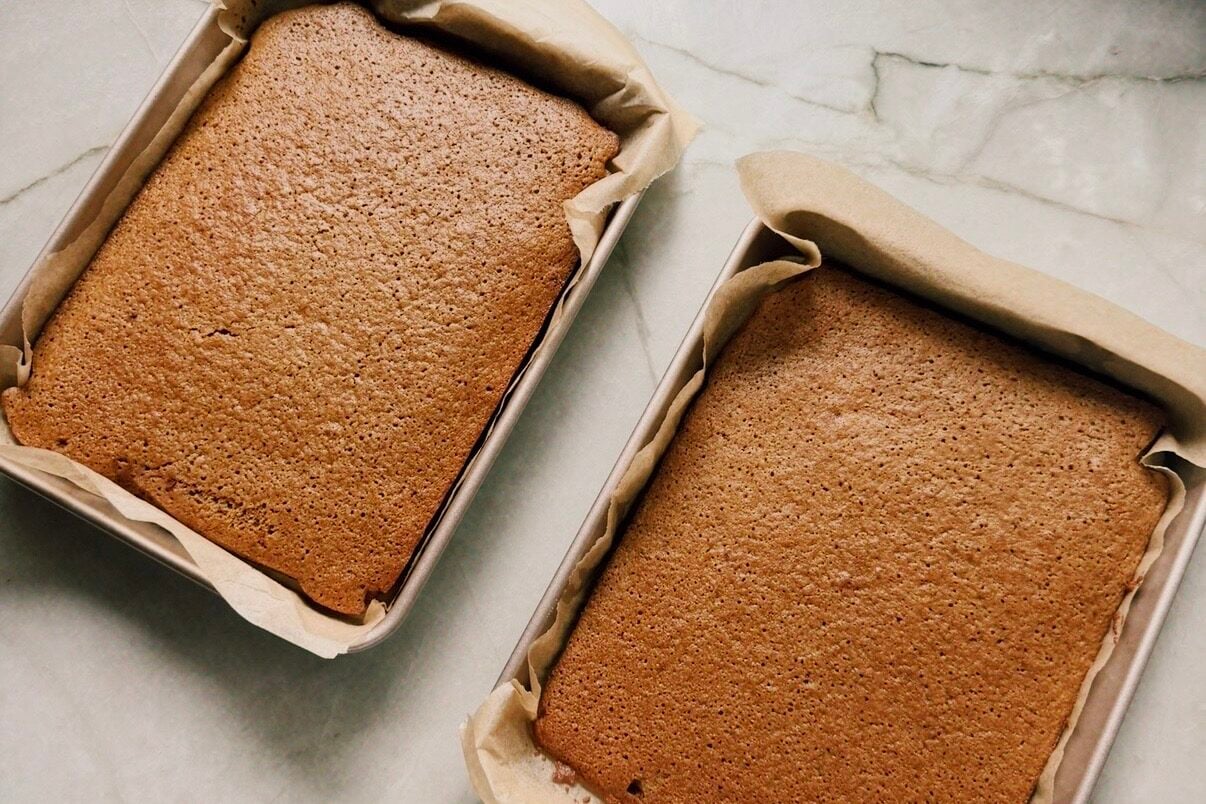
Step two. Bake and cool the cakes.
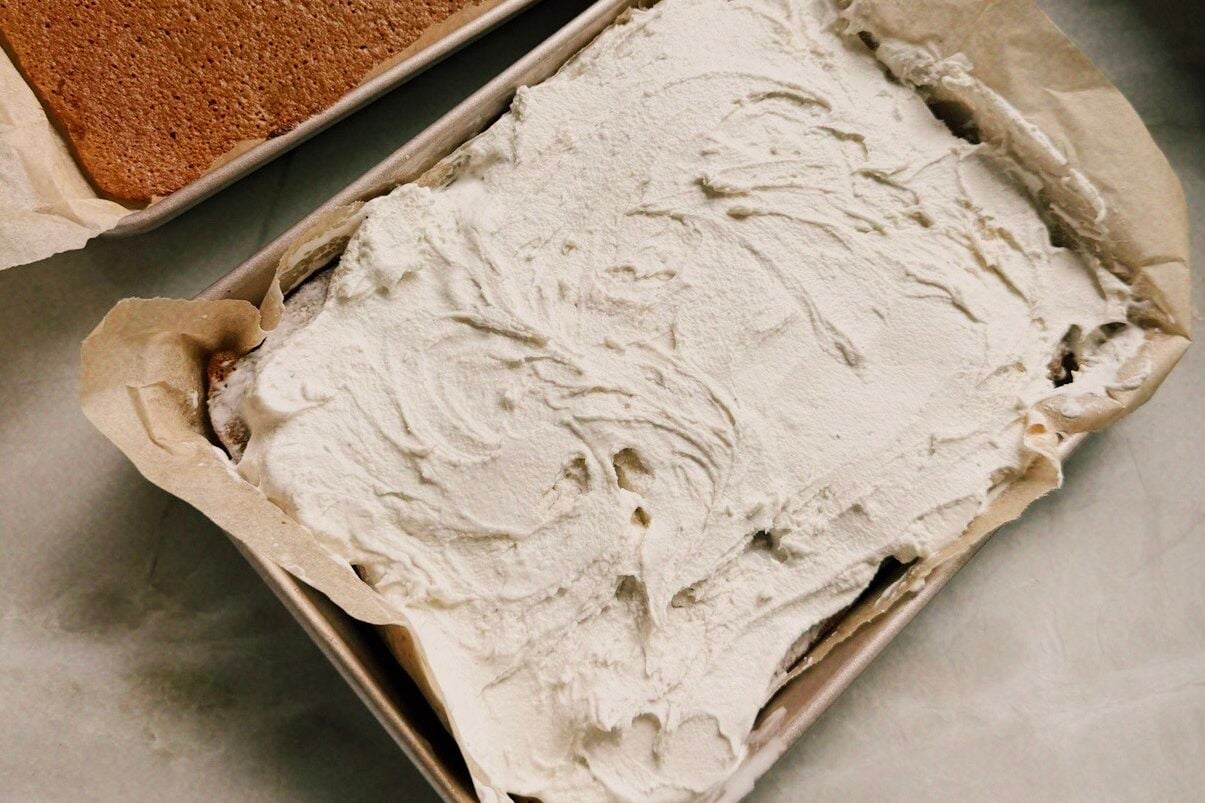
Step three. Add the ice cream to one of the cakes and evenly spread.
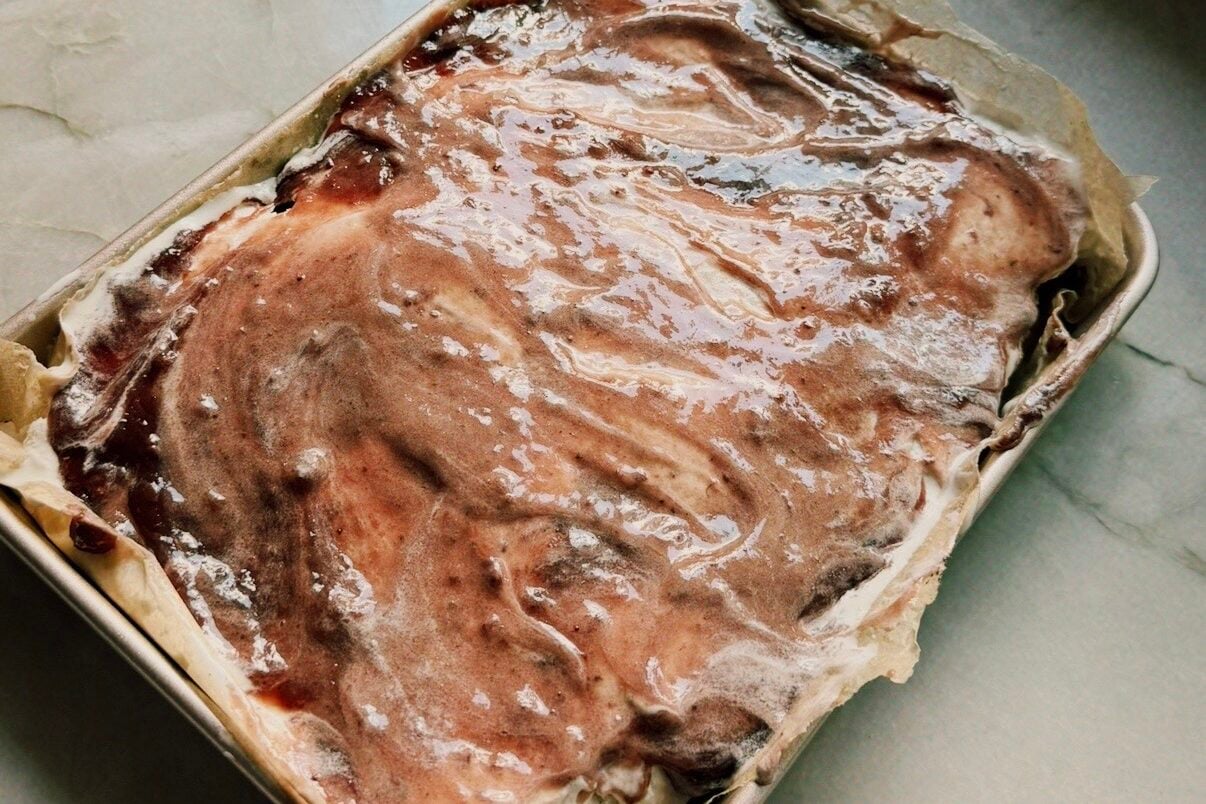
Step four. Layer on the jam.
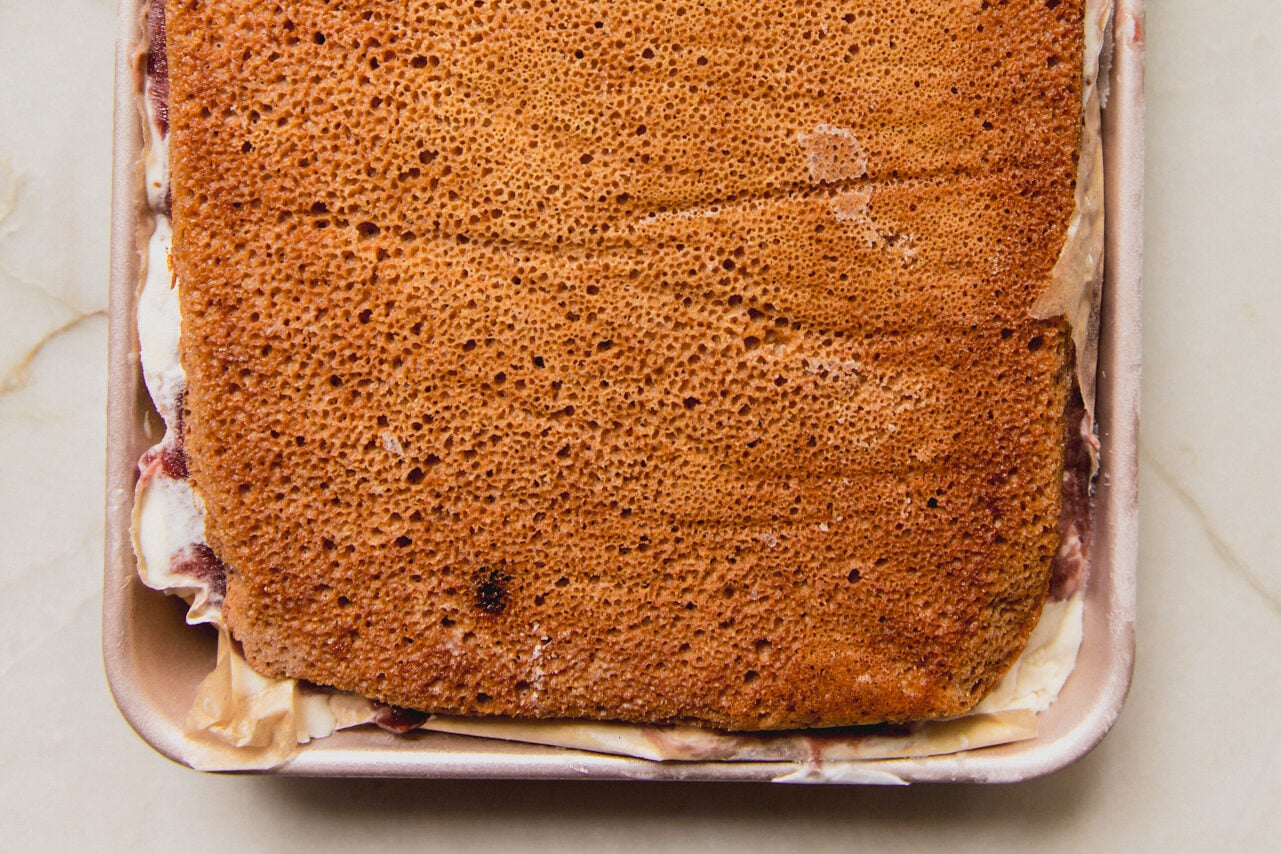
Step five. Place one cake on top of the other, like a sandwich. Freeze overnight
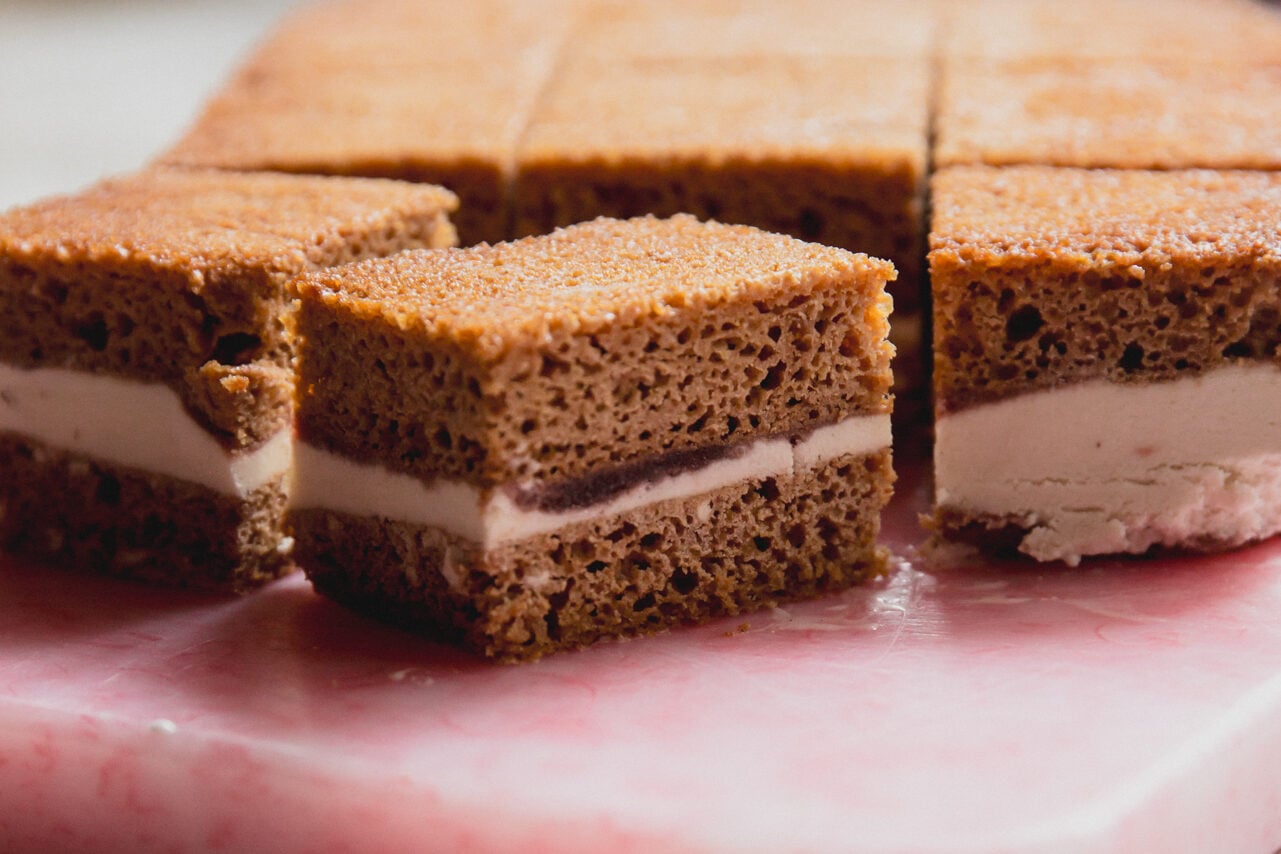
Step six. Slice into sandwiches of your desired size and serve!
Michelle’s Tips & Tricks
- Customize! There are so many possibilities with these! Swap out the flavors of the cake, ice cream, jam, etc.
- I don’t suggest rolling these in toppings. I tried to roll these in both sprinkles and crumbled cookies, and they just don’t stick very well. I wouldn’t waste time or ingredients on it!
Recipe FAQS
Yes, you can easily store leftovers in the freezer! I suggest wrapping them to prevent freezer burn.
You can easily keep them for up to 1-2 months, especially if they’re wrapped tightly.
Gluten Free Ice Cream Cake Bars
Want to save this for later?
Just drop your name and email below. Then we’ll email right to your inbox. ✉️
Ingredients
- 3 eggs
- ⅓ cup apple sauce, see notes
- ⅓ cup water
- 1 tbsp vanilla extract
- 1 box gluten-free cake mix
- 1 pint dairy-free ice cream
- 5 oz strawberry jam
Instructions
- Preheat the oven to 325 F and line two 1/8th sheet baking pans (I used these) with lightly greased parchment paper.
- Add the apple sauce, water, vanilla, and eggs to a large bowl and whisk well to combine. Add the cake mix and fold in the wet ingredients until a smooth batter forms.
- Divide the batter between the two baking pans and transfer it to the oven. Bake for 10-12 minutes or until the brownies are firm and baked through. Set aside and allow to cool completely in the pans.
- Once the cake are cool to the touch, use an ice cream scoop to add the ice cream to the top of one of the brownie pans. Use a silicone spatula to evenly spread the ice cream.
- Repeat the process with the jam, covering the ice cream in an even layer.
- Carefully flip the other cake pan onto the brownies with the ice cream and cover with plastic wrap or foil. Transfer to the freezer and allow to set for 6 hours, preferably overnight.
- Once fully set, slice into 9 (or more) and serve!